Prerequisites:
Setting up Unity
Modeling the mesh in Blender
Configuring the part in Unity
This tutorial will help you setting up reentry effects for your KSP2 modded part by guiding you through creating the reentry meshes and setting up everything needed in Unity.
Introduction

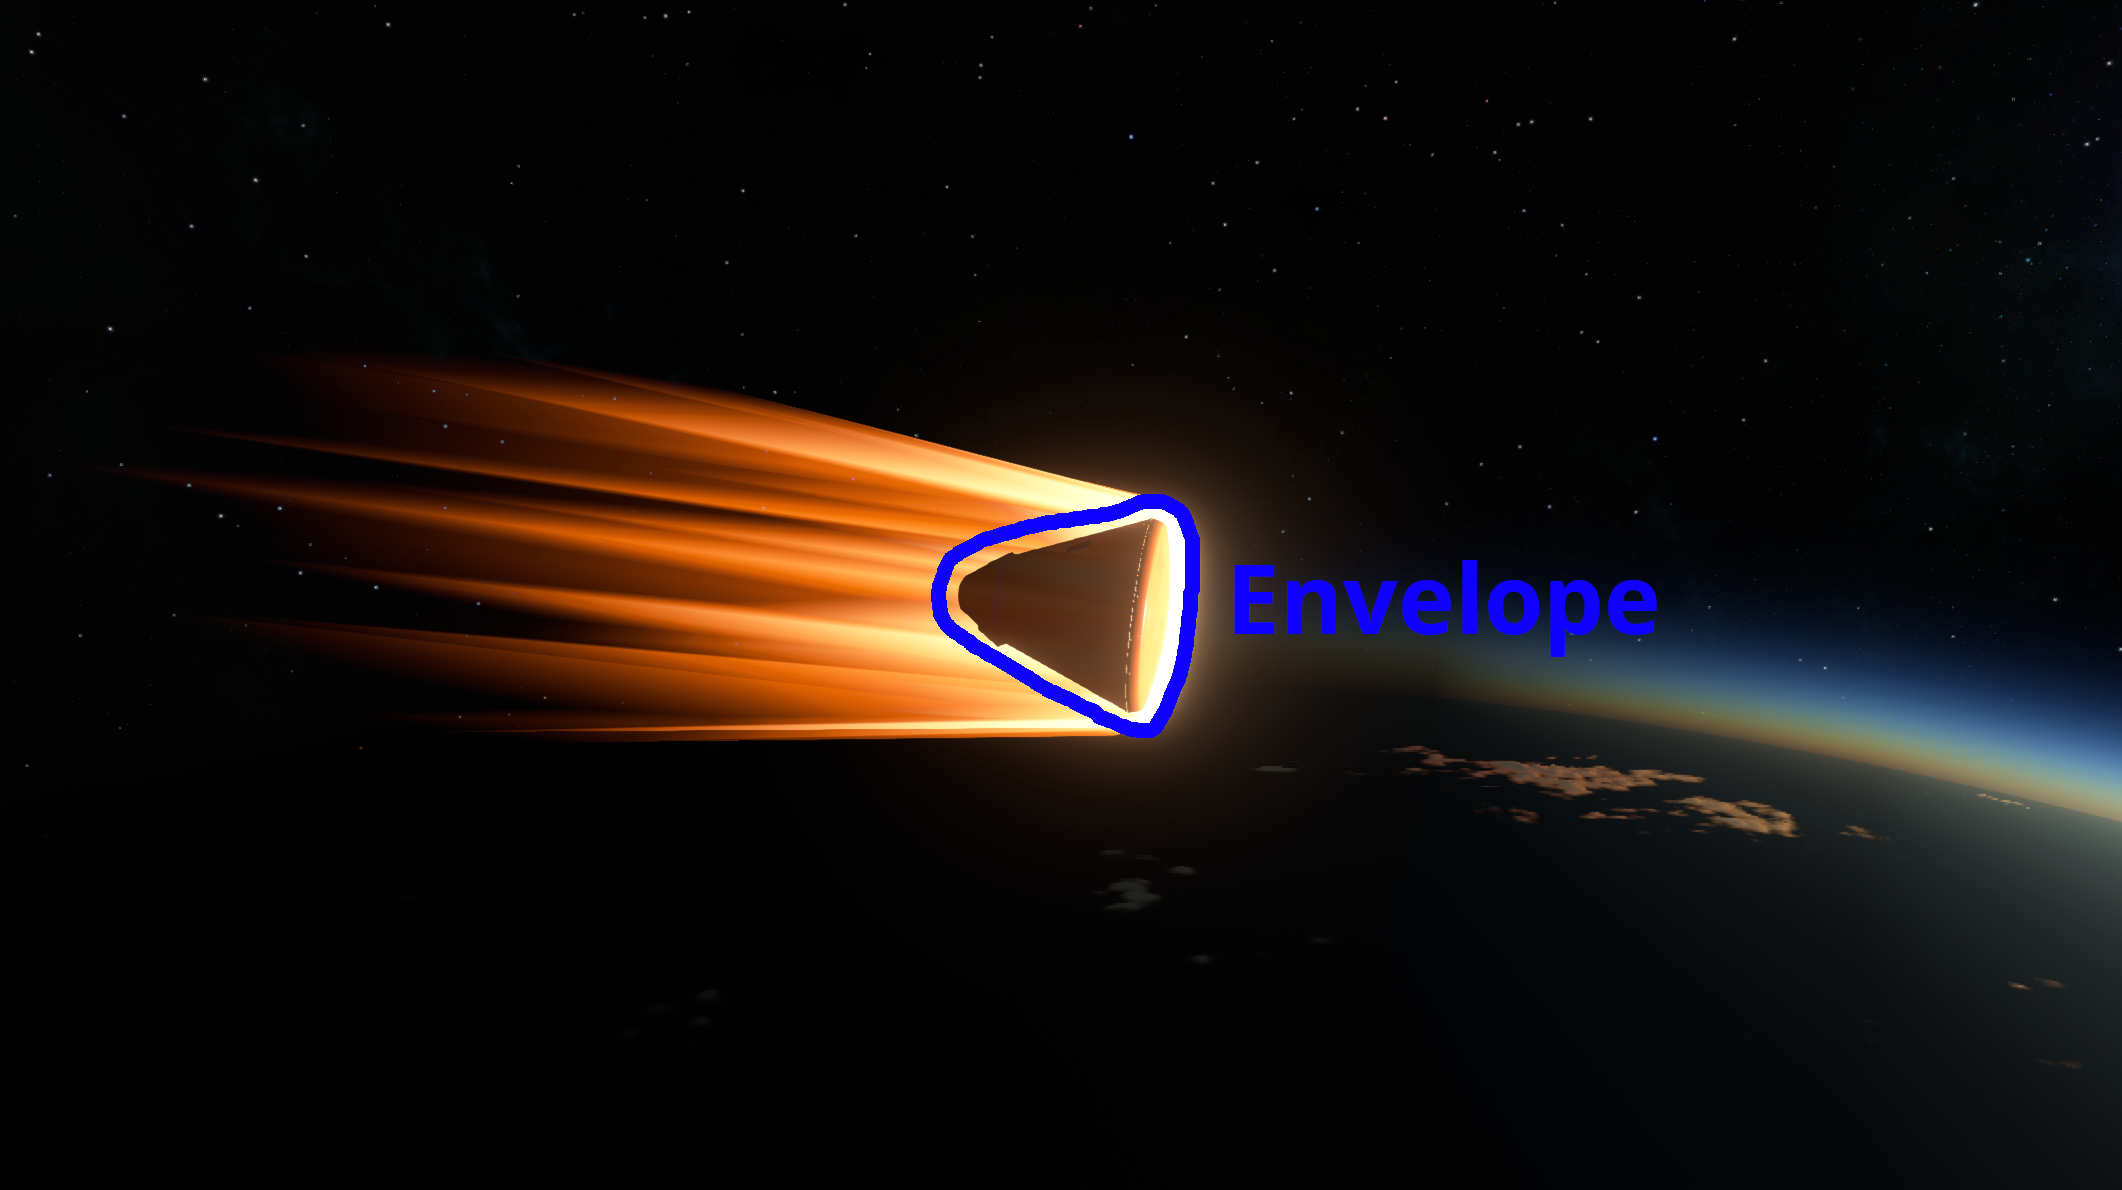
Reentry effects for parts in KSP2 are based on a custom shader which creates some flames coming out of an envelope surrounding the part (see Figure 1).
This envelope is defined for each part using a set of what we'll call reentry meshes. These meshes are set up in order to have a Level of Detail (LOD) system where a high fidelity mesh is used when looking at the part from very close and a less detailed when when looking from afar.
Reentry meshes

As we have learned before, the main part of a part's reentry effects are its reentry meshes, we'll see here a way to create them quite easily in Blender.
We will need 3 reentry mesh for each part, one per level of detail: high, medium a,d low. There is no hard rule on how many face each mesh should have, but as a point of reference, for a quite large M-sized part I would go for meshes with about 5k, 2k and 1k faces respectively.
To create a reentry mesh in Blender, follow these steps:
- Create a copy of your part's mesh and name it anything you want (for example
part_name_lod_0for the high level of detail mesh). - Scale up your new mesh by about 10% (the exact number may vary, we want the reentry mesh to completely envelop the part without any part of the part's mesh sticking out).
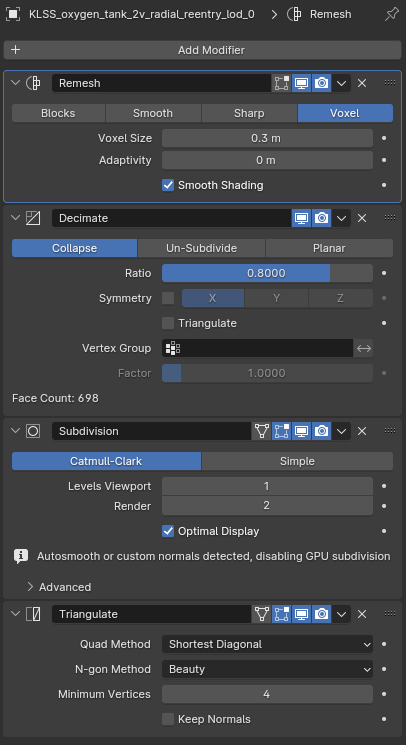
- Next we want to turn the copied mesh into a "blob" that will surround the part, we can do so by applying a Remesh modifier to the mesh in Blender in Voxel mode (don't forget to turn on Smooth Shading in the modifier's options).
- You can apply a few other modifiers to make the mesh look a bit better, I usually go with Remesh > Decimate > Subdivision > Triangulate (see Figure 2).
- Finally make sure the mesh looks good, it shouldn't be too harsh/pointy and above all else the original part's mesh should not poke through the reentry mesh.
- When finished, you can export your created mesh as a FBX file and repeat the preceding steps for all 3 reentry meshes (high, medium and low details).